Windows 10 built-in free tools CHKDSK, ScanDisk, SFC Scannow, DISM can help you scan and fix disk errors, and repair Windows 10 corrupt system files. Check the differences between CHKDSK, ScanDisk, SFC Scannow and DISM, as well as when and how to use each tool. MiniTool software offers you free hard drive partition manager, system backup and restore software, data recovery software, etc. if you need.
Windows offers some built-in easy tools to allow you to scan and repair disk errors in your Windows 10 computer, among which CHKDSK, ScanDisk, SFC Scannow, DISM are popular.
CHKDSK vs ScanDisk vs SFC Scannow vs DISM, what’s the difference between them? What does each tool do and how to run CHKDSK and the other three tools to repair Windows 10 errors?
This tutorial helps you dig out the differences between CHKDSK and ScanDisk, SFC Scannow and DISM. The detailed user guide of these four tools is also included below.
What Is CHKDSK?
CHKDSK, just as the name indicates, it means Check Disk. It is a command-line tool built-in Windows 10/8/7 and DOS system. You can run CHKDSK from Windows Command Prompt.
What does CHKDSK do? CHKDSK is designed to check the integrity of disk partition file system, scan and fix detected logical file system errors on the hard disk. Every now and then, running a CHKDSK scan can help avoid bigger problems and help prevent data loss in future.
CHKDSK can also scan the entire hard drive to look for bad sectors. Bad sectors often come with two kinds: soft bad sectors, hard bad sectors. Soft bad sectors are often caused by badly damaged data, while hard bad sectors are usually caused by physical damage to the disk. CHKDSK tries to repair soft bad sectors and marks the hard bad sectors so that they will not be used anymore.
If you find your computer hard drive is running strangely, you’d better run CHKDSK command to perform a disk scan and repair possible errors, in case you suffer huge data loss in future. (Related: Recover my files).
How to Run CHKDSK Command in Windows 10 to Fix Disk Errors
You can either run CHKDSK in Windows Command Prompt or PowerShell. Check how to run CHKDSK in Windows 10 below to fix hard drive errors.
- Press Windows + R, type cmd in Run box, and press Ctrl + Shift + Enter to open elevated Command Prompt.
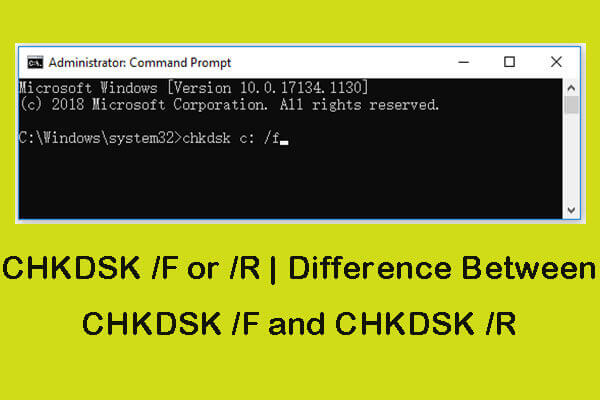
- Next you can type chkdsk *: /f, chkdsk *: /r, chkdsk *: /f /r, or chkdsk *: /f /r /x command based on your need in Command Prompt window, and press Enter to start running CHKDSK. (Note: You should replace “*” in these commands with the exact drive letter of the disk partition.)

If you meet unspecified errors when running CHKDSK in Windows 10, you can check this tutorial for some solutions: 9 Tips to Fix CHKDSK an Unspecified Error Occurred Windows 10.
What Is ScanDisk?
ScanDisk, also developed by Microsoft, was firstly introduced in MS-DOS 6.2, and is compatible with Windows 9x. It is the predecessor of CHKDSK. In Windows 95 and newer Windows 9x systems, ScanDisk has a graphical user interface.
What does ScanDisk do? ScanDisk can also check and repair disk file system errors. It can also repair cross-linked files.
However, ScanDisk cannot scan NTFS disk drives, but only scan FAT drives like FAT32, FAT16, and FAT12.
How to Run ScanDisk on Windows to Fix Disk Errors
- You can click Start button on Windows 98 or 95, and click the Run option.
- Next type ScanDisk in Run box, and press Enter to open ScanDisk window.
- Select the drive you want to scan, and select the Standard or Thorough option, and click Start to begin the scanning.

CHKDSK vs ScanDisk: Differences
1. The compatible system of CHKDSK and ScanDisk is different. ScanDisk is only supported by older versions of Windows like Windows 9x, while CHKDSK is compatible with all newer Windows versions like Windows 10/8/7. CHKDSK is the successor of ScanDisk. ScanDisk has been phased out after Windows XP. You can’t find ScanDisk in Windows 10 and it is replaced by CHKDSK.
2. The supported disk file system format is different. CHKDSK can allow you to scan both NTFS and FAT disks, while ScanDisk only allows you to scan FAT disks.
3. Some of you wonder how to run CHKDSK on all drives. Unfortunately, CHKDSK has no command option for scanning all drives at a time, while ScanDisk has a command “/all” to let you check and repair all computer local drives at once.
4. Both CHKDSK and ScanDisk are easy-to-use. But ScanDisk has a GUI interface in Windows 95 and newer, and it contains more configuration options.
Verdict: Both CHKDSK and ScanDisk can help you scan and fix disk errors. However, Windows CHKDSK vs ScanDisk, CHKDSK wins, since it’s newer, compatible with Windows 10/8/7, and supports newer file system disk scan like NTFS disk.
Best Free CHKDSK/ScanDisk Alternative – MiniTool Partition Wizard
If you can’t run CHKDSK or ScanDisk, or CHKDSK takes a very long time to scan, you can adopt a faster way to scan and fix disk errors.
MiniTool Partition Wizard is a free hard drive partition manager for Windows 10/8/7. It allows you to easily check and fix disk errors, and scan for bad sectors at fast speed. NTFS and FAT disks are both supported.
Furthermore, this tool also allows you to easily create/delete/extend/resize/wipe/format partition, convert disk format, migrate Windows OS, test hard drive speed, analyze hard drive space usage, etc.
Free download MiniTool Partition Wizard in Windows computer and learn how to use it to check and fix disk errors below.
- Launch MiniTool Partition Wizard. In its main UI, you can select the disk and partition you want to scan.
- Then you can right-click the target partition and choose Check File System -> check & fix file system error, and click Start to start scanning and fixing disk errors. You can also find Check File System option in the left panel under Check Partition section. To check disk bad sectors, you can choose Surface Test option.

What Is SFC Scannow?
There is another Windows command utility named SFC Scannow that some of you may be confused with CHKDSK.
SFC is short for System File Checker. Just as its name explains, the System File Checker tool helps you scan and repair corruptions in Windows system files.
If your Windows computer is running abnormally or often crashes, you may suspect that there are some corruptions related to system files. You might run SFC command to automatically check and repair damaged or missing system files in your Windows 10 computer.
How to Run SFC Command in Windows to Repair System Files
- Press Windows + R, type cmd, and press Ctrl + Shift + Enter to run Command Prompt as administrator.
- Next type sfc scannow in Command Prompt window, and press Enter to start to scan and repair corrupt system files in Windows 10. If you only want to scan but not repair the corrupted system files, you can type sfc /verifyonly command.

SFC Scannow vs CHKDSK: Differences
Both CHDSK and SFC Scannow are Windows built-in command-line utilities and are supported by Windows 10/8/7. You can use them to check and fix computer errors, but their functions are different.
To check and fix hard disk errors or explore bad sectors on the disk, you should run CHKDSK. To detect, repair and restore corrupt system files, you should run SFC Scannow command.
What Is DISM?
DISM is short for Deployment Image Servicing and Management. It is also a Windows built-in command-line tool that can be used to prepare, modify and repair Windows system images, including images for Windows RE (Recovery Environment), Windows PE and Windows Setup.
You can also run DISM command from Windows Command Prompt or PowerShell.
If you frequently meet the black/blue screen errors or system/application crashes in your Windows computer, then you may consider there are some corruptions of the system files.
When running SFC command can’t help resolve the issues or you can’t run a SFC scan, then you should try DISM command at first. DISM command can fix core computer file corruption and make SFC command run properly.
Check how to run DISM command in Windows 10 to repair system image below.
How to Run DISM Command in Windows 10 to Repair Corrupt System Image
Click Start, type cmd, right-click Command Prompt to choose Run as administrator.
In Command Prompt window, you can type the command lines below, and press Enter after typing each command line to check and repair Windows 10 system image.
- DISM /Online /Cleanup-Image /CheckHealth (this command checks if there are any corruptions inside the local image, but not repair them)
- DISM /Online /Cleanup-Image /ScanHealth (this command performs a more advanced scan to check if the Windows 10 image has corruptions)
- DISM /Online /Cleanup-Image /RestoreHealth (this DISM command will run an advanced scan and automatically repair any detected problems with the image)

SFC vs DISM: Differences
Both of these two command-line tools are designed to check and restore corrupted or missing system files in Windows. Generally you can only run SFC command to accomplish this task, but if it fails, you can then run DISM commands to restore the system image beforehand, and then run SFC command to fix corrupt system files.
How to Create a System Image Backup with MiniTool ShadowMaker
In case your computer has severe problems, and CHKDSK, ScanDisk, SFC Scannow, DISM all can’t help you resolve the issues, it’s advised you regularly back up important data and create a system backup image for your Windows 10 computer. When disaster happens, you can easily restore your computer to a previous healthy state.
MiniTool ShadowMaker is a professional free backup software for Windows. It allows you to easily back up data and Windows system in simple clicks.
You can use this free software to back up and restore Windows system, select desired files, folders, partitions or even entire disk to back up. The destination device can be external hard drive, USB drive, network drive, etc.
It also supports schedule automatic backup, incremental backup, file sync, etc. Download MiniTool ShadowMaker on your Windows computer, and learn how to use it to back up Windows system below.
- Launch MiniTool ShadowMaker.
- Click Keep Trial button, and click Connect button under This Computer to enter into the main interface.
- Click Backup module at the top.
- Next click Source section, and click Disk and Partitions to choose system-related drives to back up.
- Click Destination section, and choose a target device to store the backup.
- Click Back up now button to start creating a system image backup for your Windows computer.
- When needed, you can open MiniTool ShadowMaker again to easily restore your Windows system with the image backups.

How to Recover Lost Data from Windows 10 with MiniTool Power Data Recovery
Disk errors or system issues often bring data loss to your computer or hard drive. If you need, you can use MiniTool Power Data Recovery to recover data from Windows computer, external hard drive, USB or other storage devices with ease. It helps you tackle various data loss situations.
- Download, install and launch MiniTool Power Data Recovery.
- Next select the target partition under Logical Drives or select the device under Devices and click Scan.
- Check the scan result to find desired files after the scan finishes. Tick them.
- Click Save button, and specify a new destination device to store the recovered files.

Conclusion
Don’t know the differences of CHKDSK, ScanDisk, SFC and DISM, and wonder which one to use to fix errors in Windows 10? Hope you get some thoughts now after reading this CHKDSK vs ScanDisk vs SFC vs DISM tutorial.
Should you have any questions about how to use MiniTool software, please contact [email protected].


User Comments :
Post Comment